Setelah kita melakukan instalasi Centos 6.5 minimal yang diikuti dengan instalasi Gnome Desktopnya dengan perintah:
# yum -y groupinstall “Desktop” “Desktop Platform” “X Window System” “Fonts”
maka langkah selanjutnya adalah melakukan instalasi VNC server supaya kita bisa melakukan koneksi ke server kita menggunakan X Server.
Langkah-langkah instalasi adalah
Pada server Centos lakukan instalasi:
- Instal Tiger VNC Server
# yum install tigervnc-server - Pelajari konfigurasinya misalnya:
# cat /etc/sysconfig/vncservers
# The VNCSERVERS variable is a list of display:user pairs.
#
# Uncomment the lines below to start a VNC server on display :2
# as my ‘myusername’ (adjust this to your own). You will also
# need to set a VNC password; run ‘man vncpasswd’ to see how
# to do that.
#
# DO NOT RUN THIS SERVICE if your local area network is
# untrusted! For a secure way of using VNC, see this URL:
# http://kbase.redhat.com/faq/docs/DOC-7028# Use “-nolisten tcp” to prevent X connections to your VNC server via TCP.
# Use “-localhost” to prevent remote VNC clients connecting except when
# doing so through a secure tunnel. See the “-via” option in the
# `man vncviewer’ manual page.VNCSERVERS=”2:root”
# VNCSERVERARGS[2]=”-geometry 800×600 -nolisten tcp -localhost”
VNCSERVERARGS[2]=”-geometry 1024×800″ - Lakukan vncpasswd untuk user tersebut
# vncpasswd
Password:
Verify: - Start Stop service VNC server:
# service vncserver stop
Shutting down VNC server: 2:root [ OK ]
[root@localhost sysconfig]# service vncserver start
Starting VNC server: 2:root
New ‘localhost.localdomain:2 (root)’ desktop is localhost.localdomain:2Starting applications specified in /root/.vnc/xstartup
Log file is /root/.vnc/localhost.localdomain:2.log[ OK ]
- Sedikit info mengenai isi /root/.vnc/localhost.localdomain:2.log
#cat /root/.vnc/localhost.localdomain:2.log
……………………….
vncext: VNC extension running!
vncext: Listening for VNC connections on all interface(s), port 5902
vncext: created VNC server for screen 0Perhatikan bahwa Port yang digunakan port 5902
- Matikan iptables untuk sementara
#service iptables stop
Client di Windows:
- Silahkan download VNCViewer di http://sourceforge.net/projects/tigervnc/ ambil yang untuk Windows
- Instal yang VNC Viewer saja
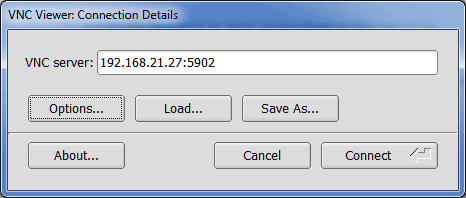
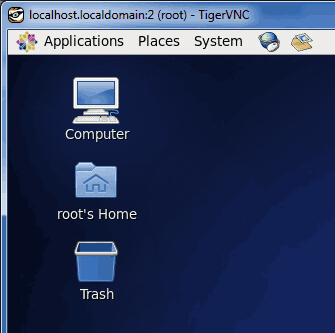
- Jalankan misal seperti gambar di bawah ini


Untuk informasi lebih lanjut silahkan mengunjungi
1. http://www.oracle-base.com/articles/linux/configuring-vnc-server-on-linux.php
2. http://sourceforge.net/projects/tigervnc/
3. http://tigervnc.org/
4. http://sourceforge.net/apps/mediawiki/tigervnc/index.php?title=Main_Page .
Kunjungi www.proweb.co.id untuk menambah wawasan anda.

