Setelah kita berhasil menginstal LAMP pada Centos 6.4 maka langkah selanjutnya adalah melakukan instalasi agar kita dapat membuat website yang lebih secure yang menggunakan SSL enryption dengan menggunakan https.
Berikut langkah-langkah instalasi HTTPS/SSL pada LAMP (Linux Apache MySQL PHP ) pada Centos 6.4
- Instalasi Apache, MySQL dan PHP:
Silahkan mengikuti tutorial di http://proweb.co.id/articles/support/instal_lamp_centos64.html . - Install mod_ssl dan openssl:
# yum install mod_ssl openssl - Restart Apache:
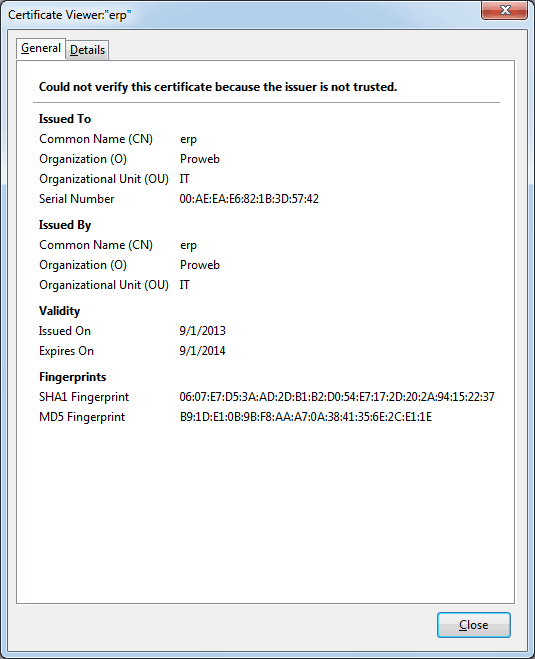
# service httpd restartPada saat ini kita sudah dapat menjalankan browser menggunakan https tetapi informasinya sertifikatnya adalah seperti berikut:

Terlihat bahwa sertifikatnya kurang meyakinkan, kita perlu membuat sendiri sertifikatnya dengan langkah seperti di bawah ini: - Membuat sertifikat SSL
a. Persiapan:
# cd /etc/httpd
# mkdir ssl
# cd sslb. Membuat key
# openssl genrsa -out ca.key 1024Hasilnya: ca.key .
c. Membuat request
# openssl req -new -key ca.key -out ca.csrHasilnya ca.csr .
d. Membuat sertifikat:
# openssl x509 -req -days 365 -in ca.csr -signkey ca.key -out ca.crtHasilnya ca.crt .
- Edit /etc/httpd/conf.d/ssl.conf dan edit untuk memasukkan ca.key dan ca.crt seperti di bawah ini:
#SSLCertificateFile /etc/pki/tls/certs/localhost.crt
SSLCertificateFile /etc/httpd/ssl/ca.crt# Server Private Key:
# If the key is not combined with the certificate, use this
# directive to point at the key file. Keep in mind that if
# you’ve both a RSA and a DSA private key you can configure
# both in parallel (to also allow the use of DSA ciphers, etc.)
#SSLCertificateKeyFile /etc/pki/tls/private/localhost.key
SSLCertificateKeyFile /etc/httpd/ssl/ca.key - Restart apache
Restart Apache:
# service httpd restartJika kita menggunakan browser dan masuk ke https maka informasi sertifikatnya akan seperti contoh berikut ini:

Terlihat bahwa sertifikatnya lebih meyakinkan dan aman digunakan.
Referensi:
http://wiki.centos.org/HowTos/Https .
Kunjungi www.proweb.co.id untuk menambah wawasan anda.

